Creating projects with components is a fantastic way to organize a large estimate. Most commonly, you’ll find this feature used when the estimate involves multiple rooms or different phases. For example, if we were estimating a kitchen remodel, bathroom and front entryway, we would create three components. You can also use components to break up the estimate by the scope of work. For example – demolition, plumbing, painting etc.
Adding Parts
So, you have created a project with components, but how do you add parts to them? This is a common question, so don’t feel left out, and it’s actually pretty easy!
The first thing we need to do is open your component. To do that, click the pencil to the right: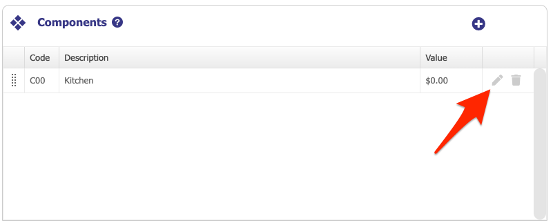
This will open your component. To start adding parts, simply search for a part in the search box, or click Browse Part Library.

Then, select which part you want to add from the results: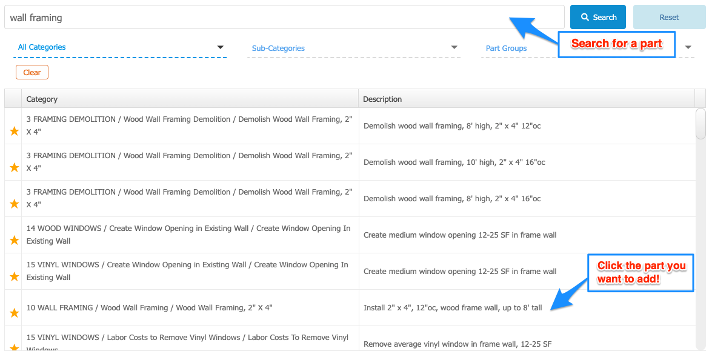
Once your part is selected, add the quantity, and click Add Part: 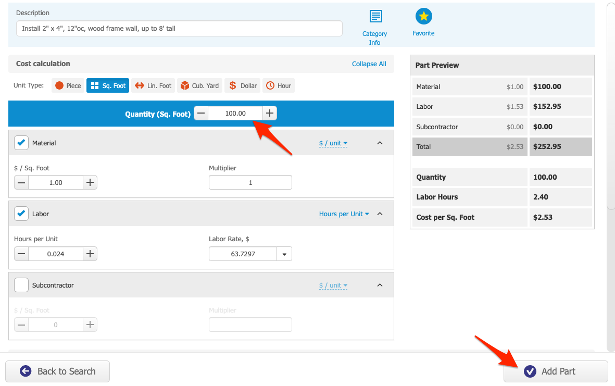
Continue that process until you have added the entire scope of work to your section!
Adding Templates as Components
What if you want to add a template to a component?
No problem! Simply click Add Template at the top. From there, you can browse the templates in your account:

Choose the template you would like to add and enter the square footage of the job. Then, click Calculate Quantities: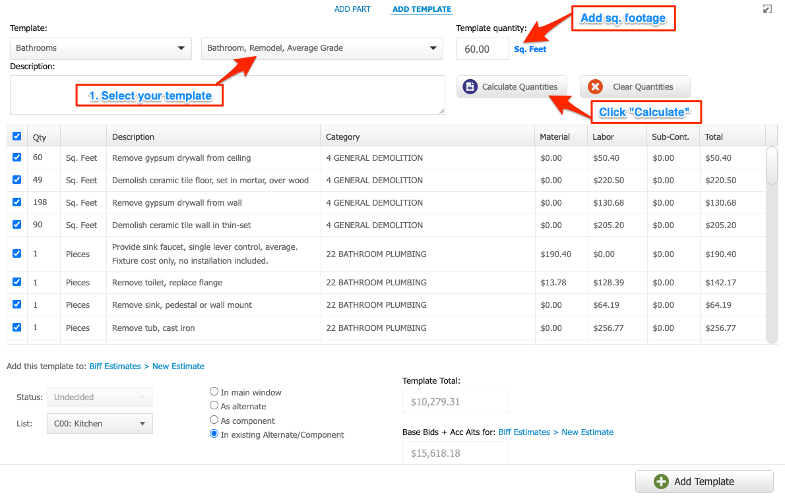
Then, scroll to the bottom. Click where it says ‘In an Existing Alternate/Component’. Then, go ahead and add that template to your selected component:

As soon as you finish adding parts, you can see them in your Component tool on your Projects page. There, you can move them up or down your list (the order they will display on proposals) by clicking and dragging on the dots, to the left of each: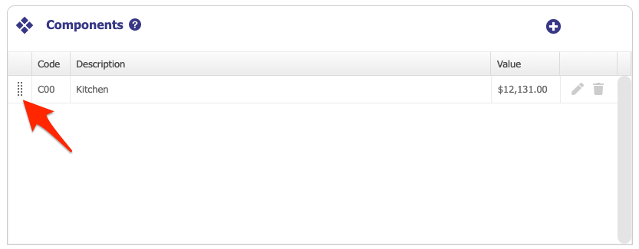
That’s it! Continue this process until you have completed your estimate. Keep in mind too that you can Add a Custom Part for things that we do not offer by hovering over the Add Part button > clicking Create Custom Part.
Hope this helps!