Clear Estimates now offers a project / estimate number option! This is a great way to organize your proposals using an estimate or project number, claim number, etc.
With this new workflow, Clear Estimates will automatically generate project numbers based on your preferences, so that those will always be available for your estimates.
Let’s get started!
Enable Project Numbers
To enable project numbers in your account, head to Options > Preferences > Project Number: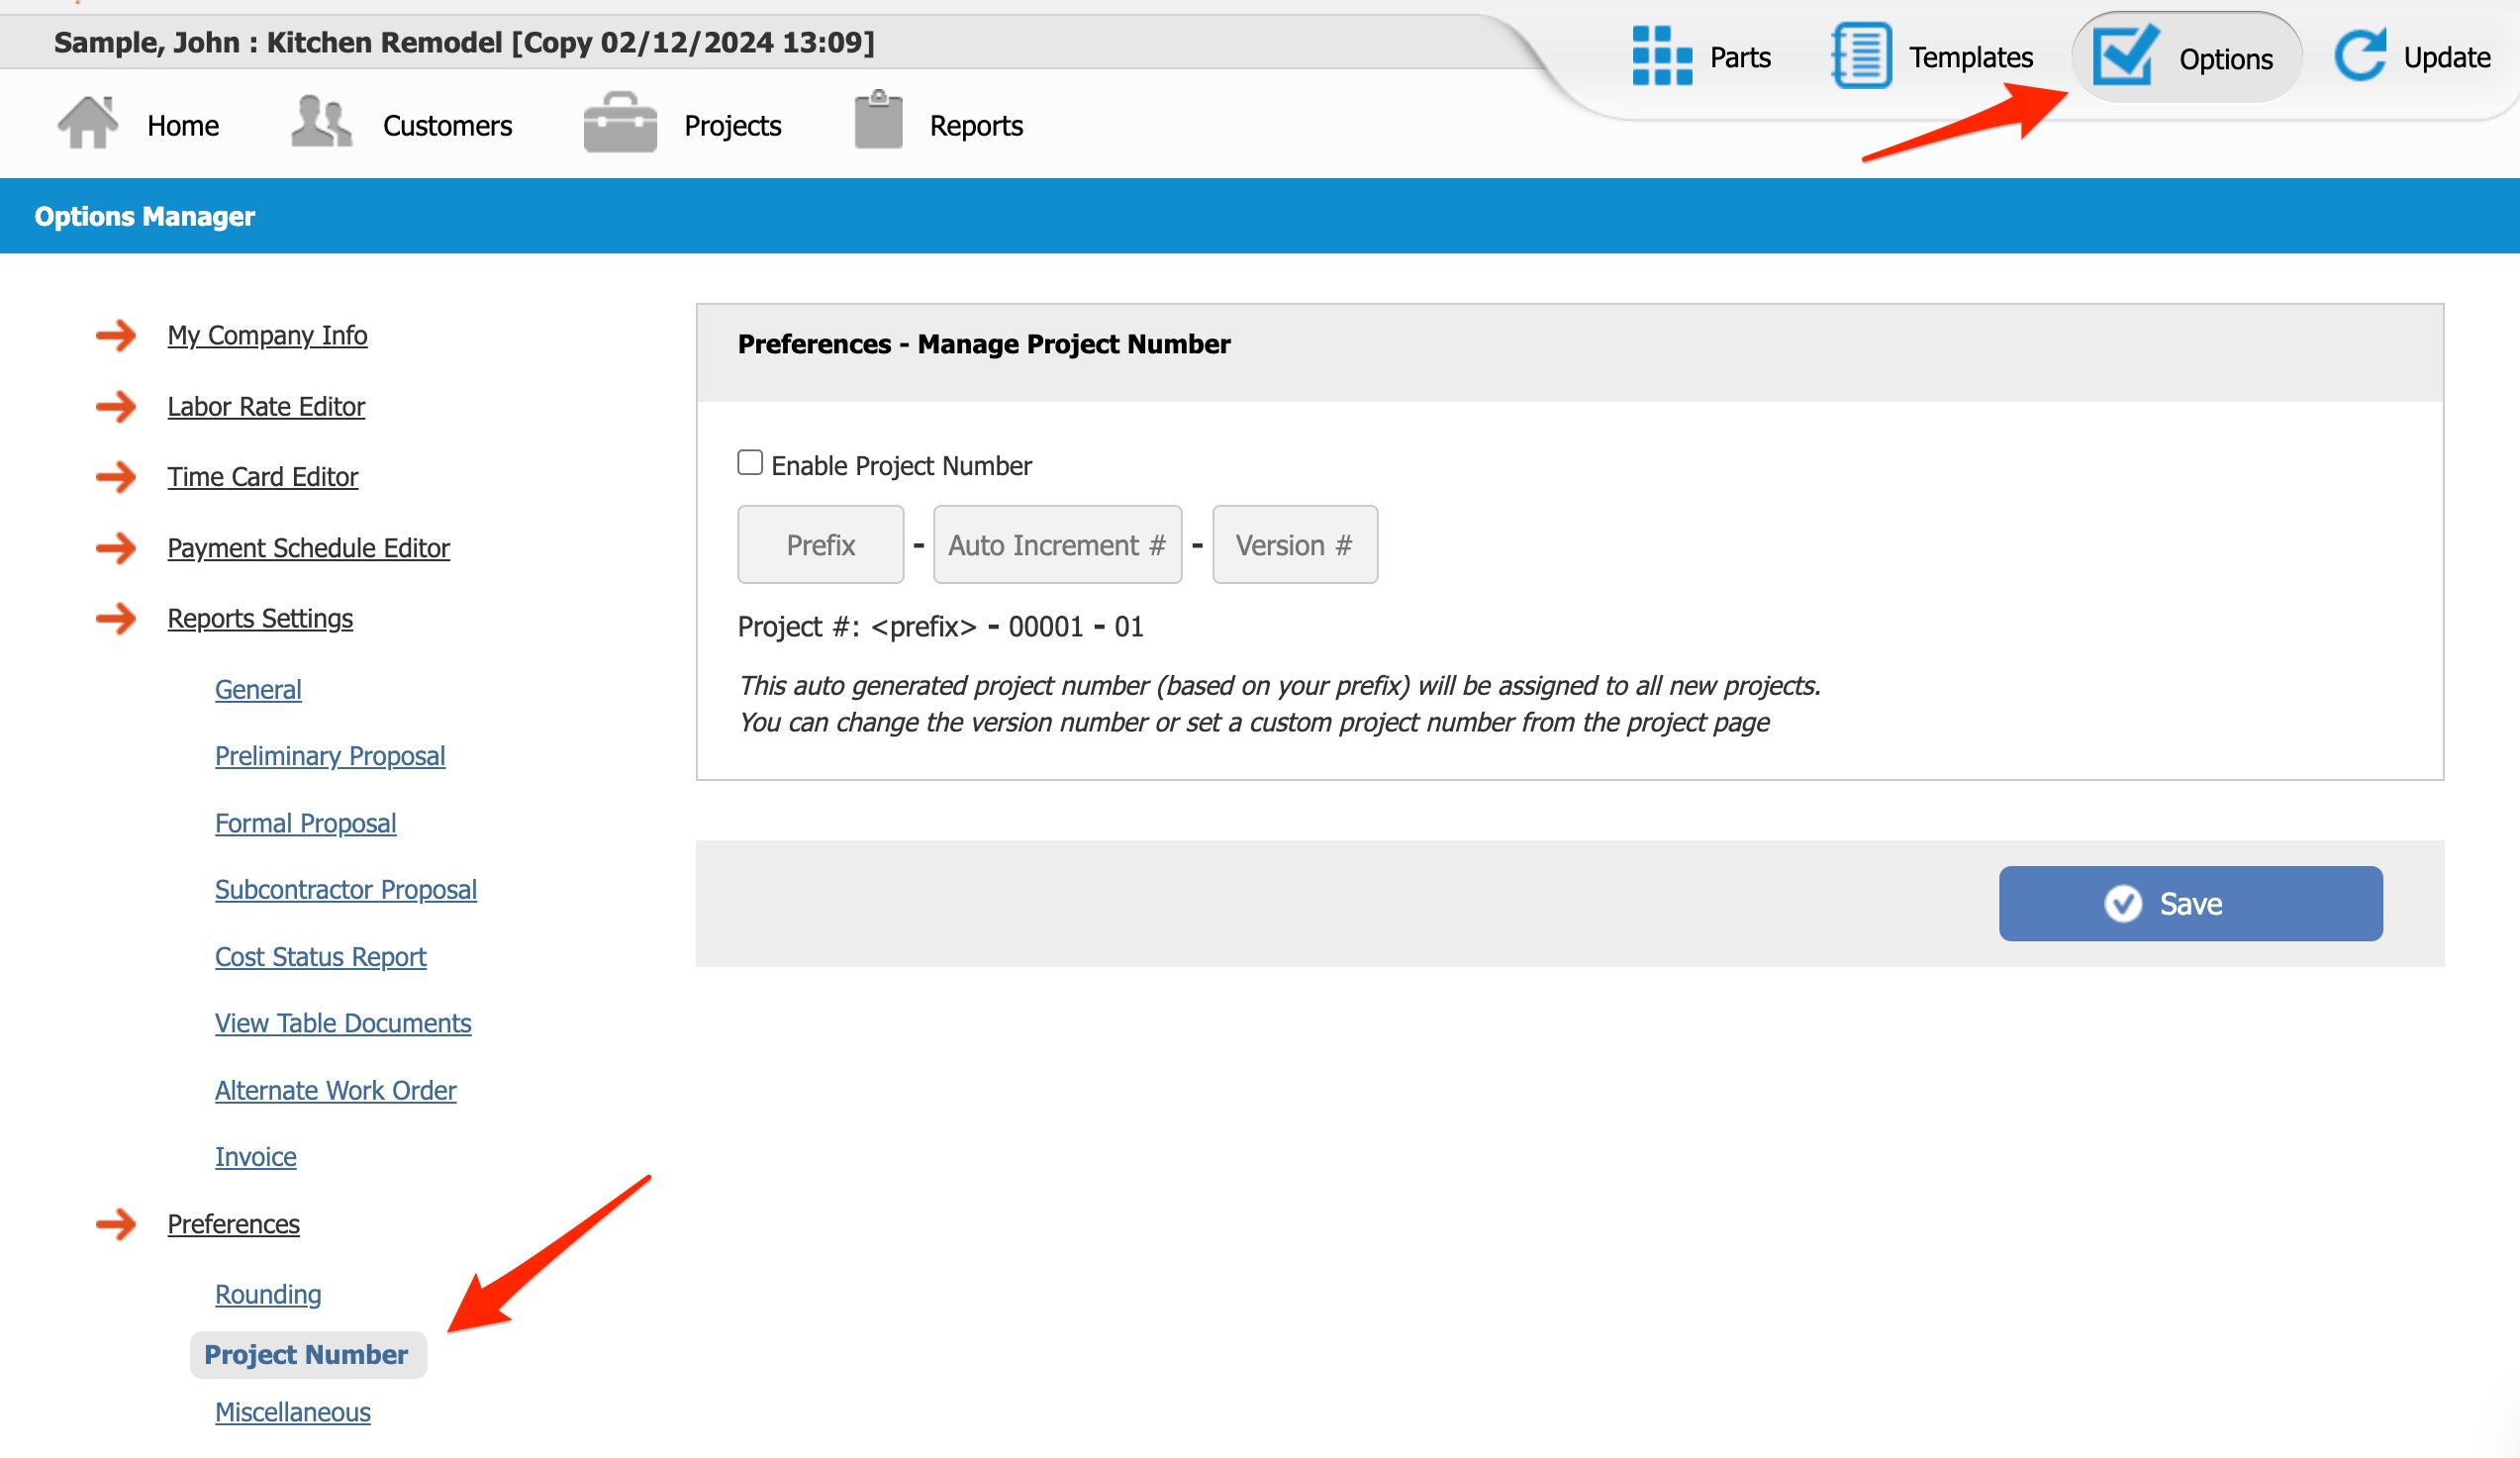
From here, click Enable Project Number:

Prefix
By default, each project number will contain a Prefix, an Auto Increment # (project number), and a Version Number:

First, add in your Prefix. Your prefix can be any four letters or numbers. Clear Estimates will use this prefix for all of your project numbers:

Auto Incrementation
The Auto Increment will increase each time you create a new estimate. You can add in a starting number of any 3 digits. Then, it will auto-increment (increase the number automatically) from there.
In this example, we'll use 100 as our starting number. Our first estimate will then be A000-0100-01. The next estimate you create will be A000-0101-01, and so on:

Warning: Choose a starting number you'll always want to use. Once a starting number is set and you've created an estimate, it will not allow you to set a lower “starting” number. The system will check the maximum auto generated number in all existing projects, and it will show an error message if the new “starting” number is less than the max auto generated number: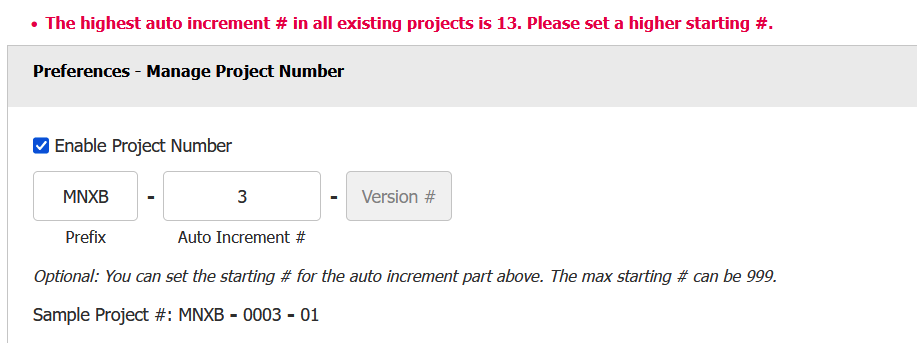
Version Number
The Version Number is increased automatically when you create new versions of the same estimate. You can do this by duplicating estimates. (See Version Numbers & Duplicating Projects below).
Once you've set your prefix and starting number, click the blue Save button:

Now your estimates will all have project numbers automatically assigned. Create a new project to see it in action. Your project number will be visible in the top left of your Projects page:

Custom Project Numbers
Once you've enabled Project Numbers, you will also have the option to set up custom project numbers. Custom project numbers will override the auto-incrementing, and allow you to type in any number you'd like.
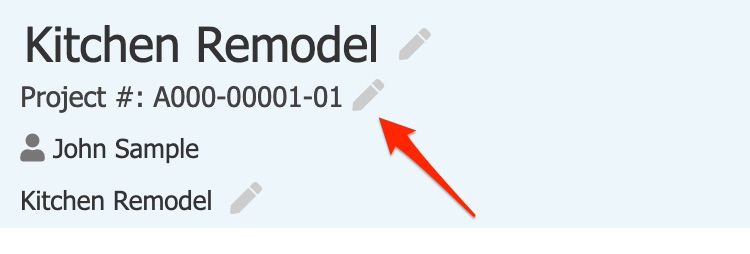
To do this, head into the Projects page for your project. Then, click the pencil next to your estimate number (top left):
Next, click the option to Set Custom Project #:
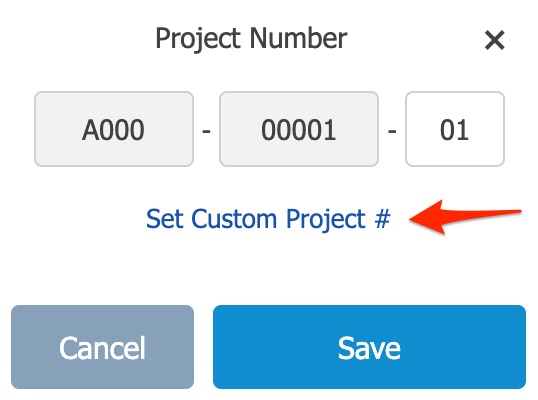
Then, just add in your custom job number and click Save:
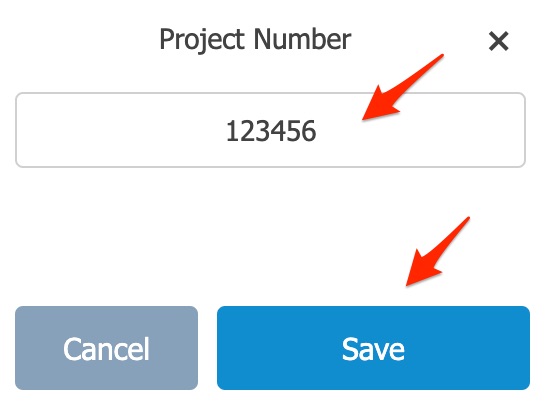
Please note - custom job numbers will not be auto-incremented for the next project you create, nor will it assign a new version number if you duplicate that estimate.
Version Numbers & Duplicating Projects
You can create new “versions” of the same estimate, each with their own unique Version Number.
The Version Number is the last two digits of your project number, i.e. A000-00001-01, A000-00001-02, etc.
The simplest way to do this is to duplicate your project. From within your Projects page, you can click More > Duplicate Project.
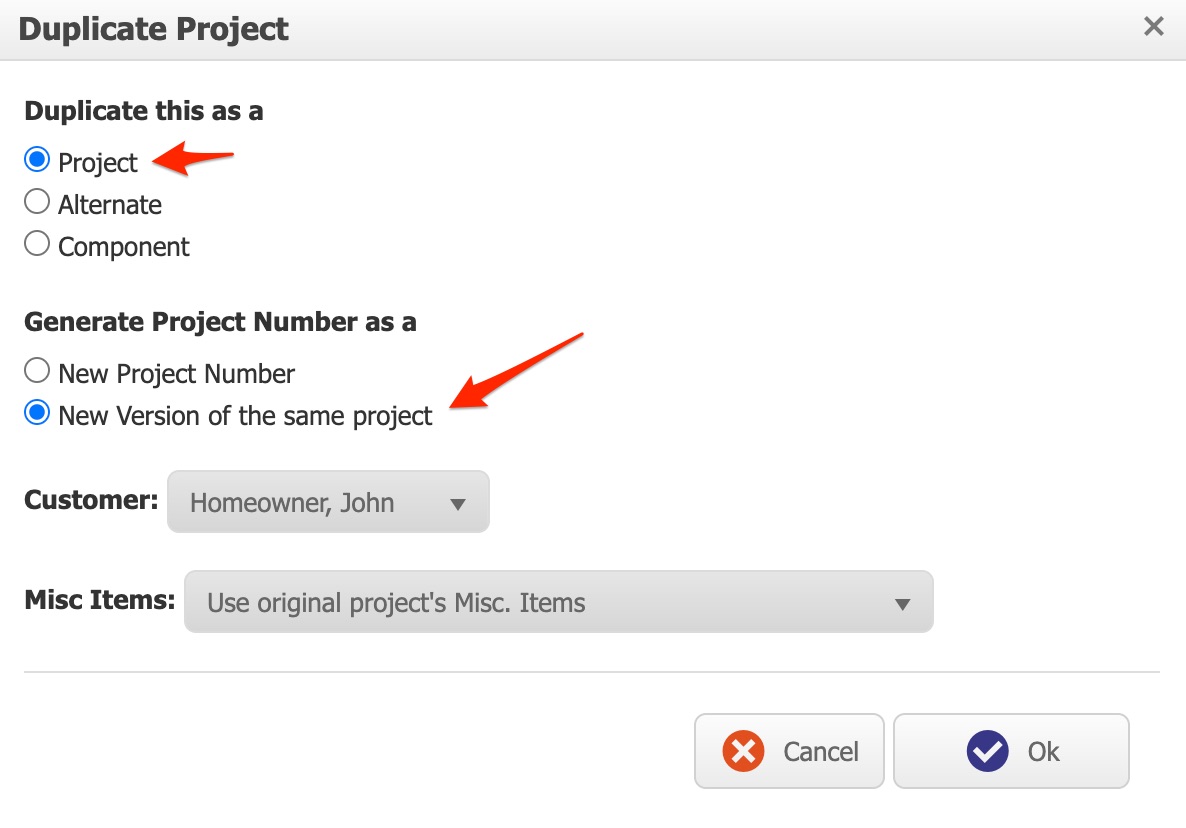
When doing so, it will ask if you want to create a new project number altogether, or create a new version of this project.
The first option will auto-increment the project number the same as if you created it from scratch.
The second option will keep the same project number, but increase the Version Number:
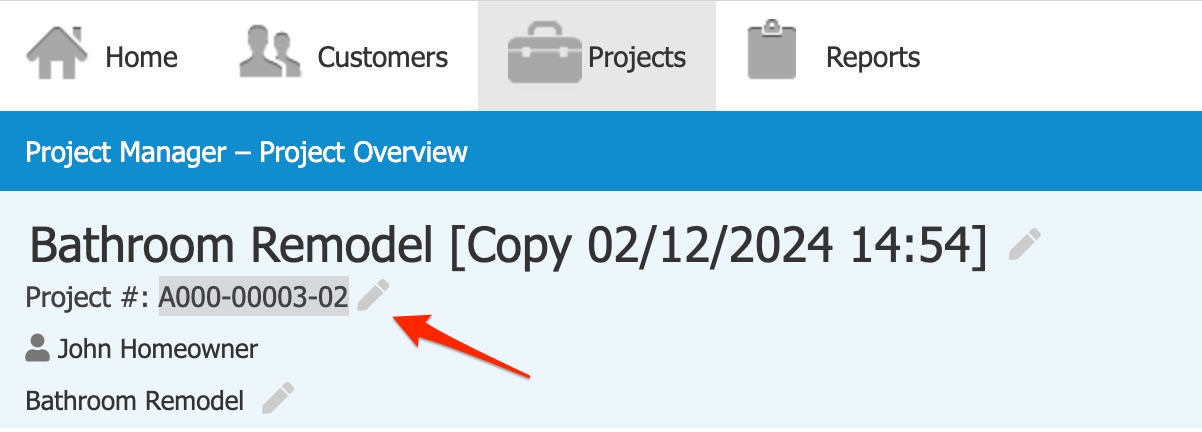
In this example we started with project number A000-00003-01. Once duplicated, the new version is called A000-00003-02:
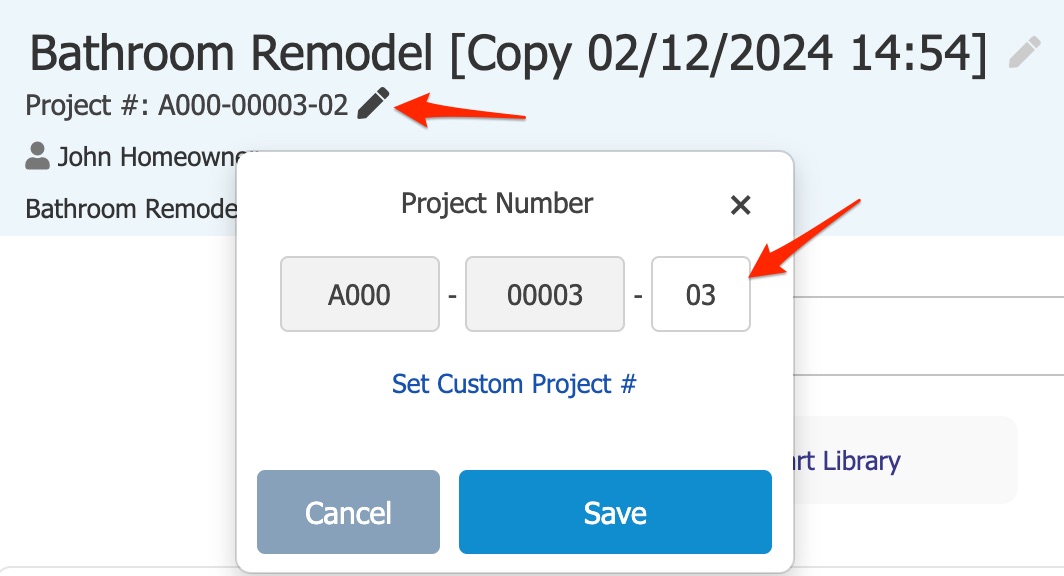
The other way to do this is by clicking the Project Number field in the top left of your Projects page, and manually adjusting the version number:
Reports Settings
Your project number will display on all reports. This includes proposals, invoice PDFs, Export Project reports, etc. You'll find the project number near the project information on these reports:

If you don't want your project number included on reports, you can turn off that option from Options > Preferences > Project Number:

That's it! Now you're all set to include project numbers on any estimates you create.